<
div dir=”ltr” style=”text-align: left;”>

Building your first Hackintosh it is quite difficult task to do because of it’s complexity but Distro’s are very good for a new comer or NewBie’s due to easy Implementations and simple Restore processes. Niresh is one of the best Distro maker in Hackintosh World who builded multiple versions of Distro’s including Mac OS X Lion 10.7.X, Mountain Lion 10.8.5,Mavericks 10.9.5 and latest one is Mac OS X Yosemite 10.10.1,All of this versions are very easy to implement and simple to restore it on USB
Create Yosemite Zone USB from windows
Download Yosemite Zone 10.10.1
Tutorial :-
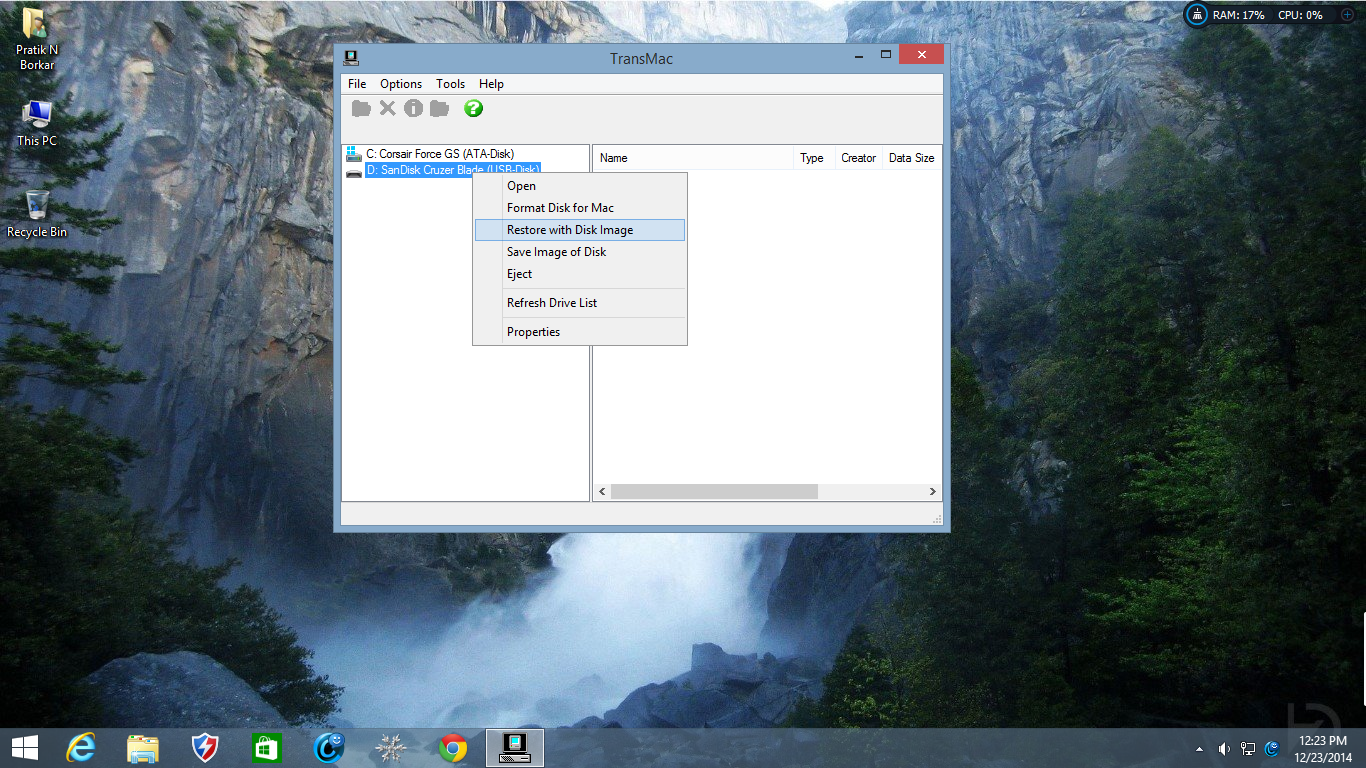
Follow this step if you’re interested to create a Yosemite Zone USB from Windows. Plug your USB drive into your computer, and open TransMac with Admin preference. Find your USB drive on the left-hand sidebar of the TransMac window. Right-click on the USB drive, and click “Format Disk for Mac”. This will erase all of the files on your drive and prepare it for Mac OS X Yosemite.

Once your USB drive is done formatting, right-click it again and click “Restore with Disk Image”. A file selection window will pop up; choose your Yosemite Zone disk image file (it will probably be called “Yosemite-Zone.dmg”), and proceed. Now, TransMac will write Yosemite Zone onto your USB drive.
This will surely take 20-40 minutes, depending on the speed of your USB drive. Once TransMac finishes, your USB drive will contain a fully bootable version of the OS X Yosemite installer.